Pages

Thursday, 30 April 2015

April's bake of the month

Made it by the skin of my teeth again....

Chocolate cake or a simple plain cake. When you want can’t decide which cake to have, why not have both.


A marble cake is perfect when you want the best of both worlds. Whilst it looks impressive, it really is so easy to make.

The beauty of this cake is you can mix and match the flavours. How about a chocolate and orange or chocolate and coffee. The possibilities are endless.


Like I always do when I’m making a sponge cake recipe I weigh the eggs, still in their shells, and whatever it says on the scales, I weigh out that amount of flour, butter and sugar.

For example the two eggs – still in their shells – weigh 187g’s. Measure out 187g’s of self-raising flour, caster sugar and butter/margarine. No matter what the eggs weigh, always use the same weight for the flour, sugar and butter.


Marble cake

Ingredients:
  • Two eggs
  • Self-raising flour
  • Caster sugar
  • Butter/margarine
  • 1 level tea-spoon of baking powder
  • 25g cocoa powder

Method:
  • Pre-heat oven to 180º c/Gas Mk 4. Fan oven 160ºc
  • Line 1lb loaf tin with baking parchment or non-stick liners.
  • Weigh the eggs, still in their shells. Whatever the eggs weigh, that’s the amount you’ll need for the flour, sugar and butter/margarine.
  • Put the sugar and butter/margarine into a bowl. Sift the flour along with the baking power into a bowl then add the two eggs.
  • Beat well until everything is combined and mixture is smooth, to the point that it will drop off your spoon.
  • Pour half of the batter in a separate bowl – don’t worry if it’s not exact – and leave to one side. Add the cocoa powder to the remaining mixture and beat until it’s has been combined.
  • Starting with the batter mix that was put to one side, take an ice-cream scoop (or a tablespoon) and dollop spoonfuls of the mixture into the tin. Then fill the remaining gaps with the chocolate mixture. There are no hard and fast rules here, be as creative as you like.
  • Finally to make the marble effect take a skewer and swirl it around the tin a couple of times (I’m afraid I forgot to do this...).
  • Bake for 40 – 45 minutes until golden brown. To check to see if the cakes are cook, gently press the surface of the cake with a finger. If it springs back it’s cooked. You can also test it by using a skewer (or knitting needle or even a piece of spaghetti). Piece the centre of the cake. If it comes out clean then it’s done.
  • Leave the cake to cool for about five minutes then remove from the tin and place on a wire rack to cool completely.

I like to serve my marble cake ‘naked’ but it would be just as lovely decorated with melted chocolate or water icing.

Sunday, 5 April 2015

What’s in your bag?


Thank you so much for your comments of support about the custom bag. They really took away any niggling doubts I had that I did the right thing. 

As I haven’t got any sewing to show I thought I’d show you something different, the contents of my sewing bag. I like to keep in this little bag (it was first attempt at making a quilted bag) all the essential items I need whenever I’m sewing.

Here we go:


Plasters (or band aids for our friends over the pond) – for when needles or pins attack!!!


Light and dark tacking threads


Small scissors


Vanishing fabric marker pens


Sewing needles (and a safety pin)


Left-handed tape measure – yes they really do exist...


Flower head pins


Thread nipper


Seam ripper


Tweezers


Thimbles – and a little sticky-tape to help it say on my finger...


Measuring gauge


Needle grippers


Sewing gauge/point turner


Hera marker – for making creases/marks on fabric


Seam presser


Compensation plates – when starting to sew through thick layers of fabric, these little bits of plastic slip under the machine foot to keep it level

What do you keep in your sewing bag?

Have a great week.

Gertie xx

PS why not pop over to Handmade Monday to see what other fellow craft bloggers have been up to.

Tuesday, 31 March 2015

March’s bake of the month

Opps I nearly did it again!!!! These months are really flying by. Before I know it, Christmas will be here....

So what have I got for you this month? How does double chocolate chip cookies sound. They’re really easy to make but incredibly yummy.

As with all cookies recipes you can add or change things to suit your own personal preference. Say for example, you like white chocolate but not milk. Simply replace the milk chocolate chips for white ones.

Or, what about adding some nuts to the cookies. Chopped walnuts, pecans, Brazil, macadamia would work. The possibilities are endless. Just have fun making and eating them....


Double chocolate chip cookies
Ingredients:
  • 4oz/100g butter/margarine
  • 3oz/75g soft brown sugar
  • 2 tbsp golden syrup
  • 5oz/125g self-raising flour, sieved
  • 1oz/25g coco powder, sieved
  • 4oz/100g chocolate chips (I used both milk and dark but any will do)
  • 2tsp milk

Method:
  • Pre-heat the oven to 180º c/Gas Mk 4. Fan oven 160ºc.
  • Grease or line two baking trays (I used Lakeland non-stick liners but greaseproof paper/ baking parchment would be fine).
  • Beat the margarine until soft then add the sugar and cream until light and fluffy.
  • Stir in rest of the ingredients and mix well.
  • Place spoonfuls of the cookie dough onto the baking trays – I used an ice-cream scoop as I’m hopeless at getting things the same size.Flatten the cookies slightly with your fingers, and make sure the cookies are not too close together otherwise you’ll end up with one giant cookie.
  • Bake for 8 -10 minutes then leave them on the tray for one minute to firm up slightly before lifting them onto a wire rack. I found they were too soft to move otherwise.
  • Leave on wire rack to cool. Resist if you dare!!!!!

Saturday, 28 March 2015

A sour note

Gosh has it really been a month since I last blogged. Where has the time gone !!!

Thanks to everyone for their comments about freebies. It certainly has given me some ideas.

So what have I been up to whilst AWOL. I made another three 'Jenny' bags. I'll put them up on the blog once Mr Gertie does his David Bailey with them....

Speaking of photos. I'm slowly coming into the 21 century with regards to social media as I've got myself a flickr account. There's only a handful of photos on there at the moment as I haven't had time to do more. However I'm coming to a quite spell, sewing wise, so I should be able to get more up.

Shortly before Mr Gertie retired I made a list (think jumbo size loo roll!!!!) of jobs that needed doing around the house. I'm pleased to say that painting and decorating the living room and dining room can now be crossed off the list.

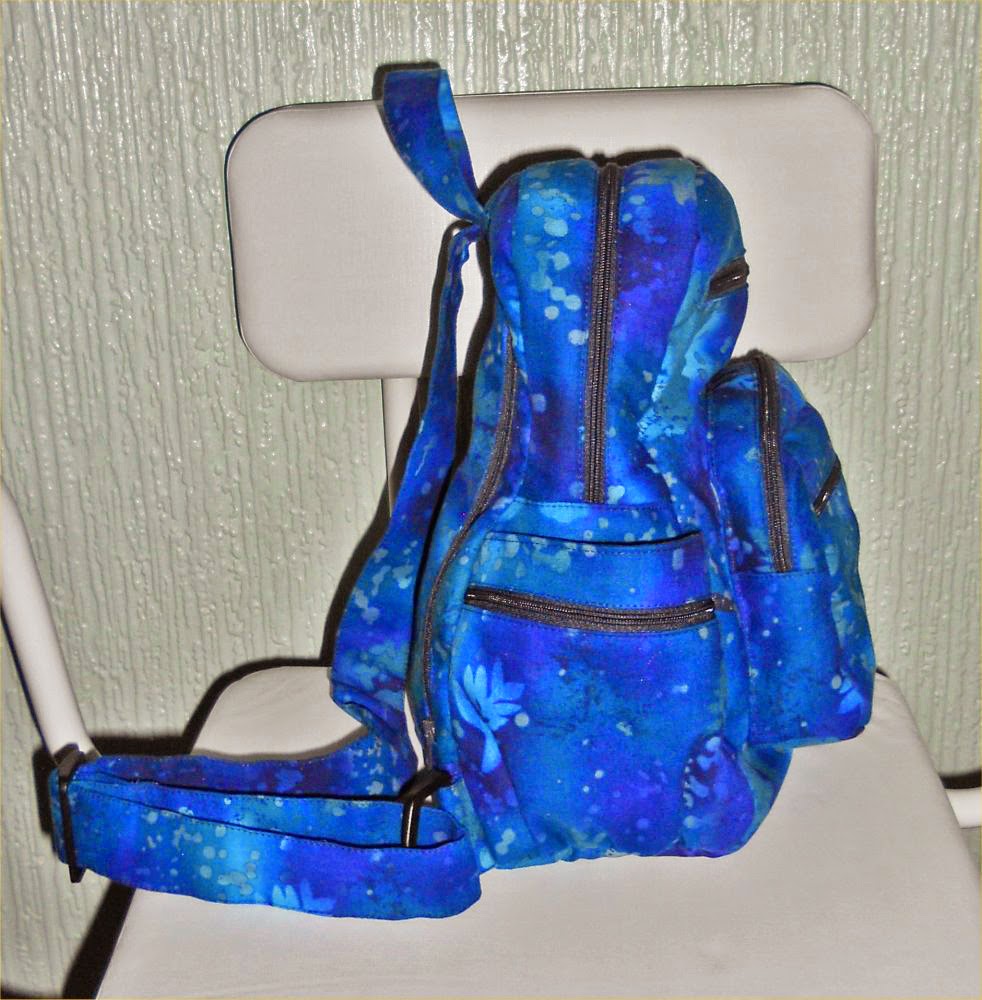
On the 'Gertie's Bags' front I had another eBay sale and also a request for a custom made bag.


The customer liked the 'Jenny' bag she's seen on eBay and asked if I could make it in a different foxy print fabric. As the correspondences about the bag progressed (what size did she want etc), she gave me details of what fabric she wanted (a lovely non-foxy print from Cotton Patch).


She also came back with images of a backpack she'd seen elsewhere and asked if I could make one like that instead as she wanted lots of pockets. I pretty much had to design the bag from scratch but I love a challenge so it didn't bother me.


When I finished the bag I contacted the customer and the good relationship we'd built up turned slightly sour. She wasn't happy with the price - £40 - and asked for a complete breakdown of the costs as she had been expecting to pay £25, the same as the 'Jenny' Bag.

The raw materials (as well as p&p) came to over £25 and I only charged £15 labour - £1 per hour - even though I spent a lot more than 15 hours designing and making it.

To be fair to the customer, she did accept that as she had requested a custom made item she would have to buy it, but would like the bill to be reduced to something more favourable (I'm guessing no more than £30). I thought long and hard about it and decided that as I wasn't prepared to reduce my hourly rate down to 33p I withdrew the bag from sale.

I know some would say that I cut off my nose to spite my face as I've now been lumbered with the bag when I had a sale for it. When I set up 'Gertie's Bags' I did so because I loved sewing and wanted people to enjoy having something that was completely unique. I knew that as she wasn't happy with the cost instinct would make her dislike the bag. The last think I wanted was for the bag to be stuffed in a cupboard because of the issue of the price.

No doubt you'll tell me I'm mad.....

Have a great week.

Gertie xx

PS why not pop over to Handmade Monday to see what other fellow craft bloggers have been up to.

Saturday, 28 February 2015

February's bake of the month


Phew!!! Just made it in time for this month’s bake of the month.

I always feel sorry for fruit cakes, as with the exception of Christmas and Easter, they’re pretty much ignored for the rest of the time. Not today.

This cake is slightly different to the more traditional fruit cake. Whilst there’s alcohol in it, it doesn’t use the conventional rum, brandy etc. It uses beer (porter/stout to be exact) which gives it a lovely flavour.

The method used to make the cake is also different. Instead of creaming the butter and sugar as you would normally, most of the ingredients are put in a pan and left to simmer. This allows the fruit to absorb the fabulous flavours of the orange juice, mixed spice and beer.

The end result is a beautifully light, moist cake which I’m sure even fruit cake haters would enjoy....


Fruit porter cake (adapted from a Goodfood recipe)

Ingredients:
  • 6oz/175g butter
  • 1lb/450g mixed dried fruit
  • Grated zest and juice of 1 orange
  • 6oz/175g light muscovado sugar
  • 7fl oz/200ml porter/stout (Guinness, Caffrey's or whatever you like)
  • 1tsp bicarbonate of soda
  • 3 eggs, beaten
  • 10oz/300g plain flour
  • 2 tsp mixed spice

Topping:
  • 2 tbsp flaked almonds
  • 2 tbsp Demerara sugar

Method:
  • Pre-heat oven to 150º c/Gas Mk 2. Fan oven 130ºc.
  • Line a deep 8 inch/20cm round cake tin with baking parchment or cake liner. 


  • Put butter, dried fruit, orange zest and juice, sugar and porter/stout in a large pan. Bring slowly to a boil, stirring until the butter and sugar have dissolved, then simmer for 15 minutes.


  • All the mix to cool for 10 minutes then stir in the bicarbonate of soda. The mixture will foam up but don’t panic as that's supposed to happen.


  • Stir the eggs into the pan then sift in the flour and spice, mixing well.


  • Pour the mixture into the tin, smoothing the top with the back of a spoon, then sprinkle over the flaked almonds and Demerara sugar.
  • Bake in the oven for 1 ¼ – 1 ½ hours. To test if it’s cooked insert a skewer (I prefer to use a piece of spaghetti for this but you could use a clean knitting needle or cocktail stick) and if it comes out clean, it’s done.
  • Cool in the tin for 15 minutes before turning out on a wire rack to cool completely.

Note:
The addition of the flaked almonds and Demerara sugar gives the cake a wonderful crunchy topping. You can simply leave them out if you prefer.

Sunday, 15 February 2015

A round up of the news

So, what’s to report since I last blogged. 

I was drastically running out of storage space in the workroom so had a massive clearout. Even though it’s only a small room, it was full of stuff (I even found two dolls belonging to my niece and she’s 27 now....), so it took several days to get through it all. It was well worth it though as I now have space. Yippee!!!!

On the sewing front there’s still an awful lot of fabric left from Mr Gertie’s work shirts so I looked around for ideas to use them in another quilt (or several....). There was a lot of blue fabric in the work shirt collection so one pattern really stood out. The lighter shades came from Mr Gertie’s shirts, the darker colours were bits of fabric I had lying around.


It’s not quite finished. I’ve still got the backing fabric and the actual quilting to, but at least it gives you an idea of what it’ll look like completed.

For Christmas Mr Gertie got some new photography equipment, and as he needed to test them out, I suggest my bags would be perfect for this. It was a win-win situation as he got to play with his Christmas toys and I got some updated photos for eBay and Etsy.

Speaking of eBay, I’ve had another sale!!!!! A large make up bag. That really put the nail in the coffin for the Folksy shop as it’s hardly getting any viewings.  So, I’ve moved all that stock over to my new Etsy shop. It’s only been up and running two days but has had more viewings in that short time than Folksy had since it opened.

I’m still ploughing my way thought various books about selling online, and in particular, promoting via social network, as that seems to be the way forward. As I’ve mentioned before I’m a total social network phobic so might have to employ a teenager to do my marketing for me!!!!!

When I mentioned to my sister that I was setting up ‘Gertie’s Bags’, she asked if I was going to give away any freebies with every order.  I can see where she was coming from as I’ve often received little gifts (key rings, sweets etc) when I’ve bought things online and it does seem good PR. 

I ran the idea past Mr Gertie but he thought it was a waste of time and effort. He can’t see why I make little matching fabric key ring purses that are attached to the zips of all the larger bags. What do you think? Do you give your customers little freebies, and if so what? If I did go down the freebie route it would be only something simple, like a fabric bookmark, which would take no time at all to make.

Have a great week.

Gertie xx

PS why not pop over to Handmade Monday to see what other fellow craft bloggers have been up to.

Sunday, 1 February 2015

The Jenny bag

Two years ago I made a rucksack for my friend Jenny. She asked if it could be similar to her favourite bag that was getting a little old and worn.  With paper, pen and a tape measure I came up with a design.


Rucksacks and backpacks are very much in vogue (I’ve been using them for years so yeah I’m trendy!!!!!) so I thought I’d put one into production for ‘Gertie’s Bags’.

I didn’t want it make it too big so slightly tweaked the bag pattern that I made for Jenny. The front pocket was made wider and deeper, more internal pockets added and the straps were made longer.


Pattern sorted, now the fabric. I wanted something that would appeal to both young and old. Having bought rather a lot of fabric recently (think credit card yelping!!) I couldn’t justify buying any more. Well, I could, but there would be lots of tutting from Mr Gertie...


I chose something that came from a fabulous shop in Stratford upon Avon. It’s only little, but boy, do they pack a lot of fabric in. It was so good that I went back the following day for more.

I now need to decide where to sell it from. Because Folksy has been pretty disappointing I’m giving Etsy a try so am moving my Folksy stock over to there.  However my first sale came from eBay. I think the only solution is to make another then each will have one.

That still doesn’t solve the problem of which one first so I suspect it’ll be heads or tails !!!!

Have a great week.

Gertie xx

PS why not pop over to Handmade Monday to see what other fellow craft bloggers have been up to.