Pages

Sunday, 24 February 2013

Squares before my eyes


When I bought my new sewing machine in 2011 it came with a pretty boring white PVC cover.

A couple of years ago my Mam had embroidered me a lovely cover for my overlocker, and as they are both next to each other, my sewing machine looked a little sorry for itself.


Armed with my trusty lefthanded tape measure I took the sewing machines vital statistics, then with a rotary cutter, cut out loads of 2 inch squares from my stash of spare fabric.


The construction was pretty easy. I stitched together the squares to make strips long enough to wrap over the machine then after pressing the seams, stitched the strips together.


When I sandwiches the strips and the wadding together, instead of using fabric as the foundation layer, I used tissue paper. After I had finished stitching the diagonals lines the tissue paper was simply torn away. Finally the sides and top were stitched together.


The lining, from old cream sheets, was cut to size and the sides and top were stitched together. The bottom edges of both the main fabric and the lining were lined up, then leaving a gap of about six inches, I machine stitched them together.


Once the seams were pressed and the cover had been turned right side out, I hand stitched the gap.


Gertie xx

PS pop over to Handmade Monday to see what other fellow craft bloggers have been up to.

Sunday, 10 February 2013

Log cabin mat


When I got my quilting cutting boards I knew they needed to keep them flat. The smaller size wouldn’t be a problem as it could just stay on the bench in my work room. Keeping the larger one flat, however, was going to be problem.

Other than the floor (not practical….) the only other place to keep the boards flat would be on top of my wall units.

I wanted to keep all the boards and rulers together so asked Mr Gertie if he had any spare cardboard in his workroom that could be used to make a folder to keep them secure.

Half an hour later Mr Gertie had made me a folder. Don’t get me wrong. It was just what I wanted, however it was rather boring. What it needed was a cover to put over it.

I could have made the cover out of strips, which would have been ok, but I wanted something a little more challenging.  I’ve always liked log cabin patterns but never made them. Why not now….

I didn’t want the blocks to be too big so settled on a small log cabin design using five colours.

The light colours were from old shirts whilst the rest came from left over cocktail/ evening dresses fabric.  

I only wanted to cover the outside of the folder so added a large border to the top of the work using the same dark green fabric as the longest strip.  As the edge was only going to be stapled to the cardboard, I overlocked it to prevent fraying.

Confession time: my overlocker was already set up with cream thread but instead of replacing them with either dark green or black thread I left things as they were and overlocked the edge using the cream. Only I was going to know, however, but  the cardboard wasn’t straight……

Gertie xx

PS pop over to Handmade Monday to see what other fellow craft bloggers have been up to

Friday, 8 February 2013

I've caught the bug


When we went on our cruise in 2011 my Mam made me a lovely small quilted tote bag to keep my needlework and reading glasses in. 

I was looking for another bag project to do after catching the patchwork bug from my first bag.

“See what you think of this book”, said my Mam, handing me Lisa Bergene’s ‘Patchwork with Pizazz’ book, “I used it to make your tote bag”.

Inside were 60 quilts and bags to make. Although the quilts were lovely, it was the bags that I was interested in. There were loads of different bags of all shapes and sizes, ranging from simple to difficult to make. As I was just starting quilting I chose a simply ‘make up’ bag.

Looking through my scrap box I found some fabric that had come from a camisole top which I thought would be perfect.

If I’m honest the fabric wasn’t the best choice as it had quite a bit of stretch in it.

The finished quilting block was anything but straight….. However as the bag isn't going to be on show I'm not bothered.

It was meant to fasten with a zip but I didn’t have one small enough so just used press studs instead.

The bag has now found a use by becoming my sewing bag. It’s perfect for looking after the small items I use regularly when I’m sewing - needles, seam ripper, tape measure, plasters… 

Gertie xx

Saturday, 2 February 2013

February's bake of the month

The first Saturday (holidays permitting.....) of every month I'll be posting a 'bake of the month'. This month's bake is chocolate chip cookies. Enjoy.


I’ve recently rekindled my love of cookies. 

It’s entirely ‘Subway’ the sandwich shop’s fault. We’ve started to go there as an occasional treat, and while Mr Gertie will have the foot long sandwich, I’ll have a six inch one plus some cookies. Mr Gertie doesn’t like cookies so I have to eat them all myself. Tragic!!!!!

I thought I’d try my hand at making some cookies as it was years since I made any, and my baking has come on a long way since then…..

These are best eaten within a day or two of making as they do go a little soft if left any longer. As there were too many for me to eat (not strictly true but I didn’t want to end up like a house end) Mr Gertie took most of them to work for his colleagues. 

I used my Kitchen Aid mixer (other mixers are available…..) as I’m lazy but you could make it by hand. 

This recipe is adapted from my old and battered Be-Ro cook book. Like Delia or Mary Berry, I found they won’t let you down. I got 14 decent sized cookies out of the mix but you could make them smaller. 

   
Chocolate chip cookies 
Ingredients:
  • 4oz/100g margarine (or butter but you prefer)
  • 3oz/75g soft brown sugar (I only had dark but you could use light)
  • 2 tbsp golden syrup
  • 6oz/150g self-raising flour, sieved
  • 4oz/100g chocolate chips (I used both milk and dark but any will do)
  • 2tsp milk

Method: 
  • Pre-heat the oven to 180º c/Gas Mk 4. Fan oven 160ºc.
  • Grease or line two baking trays (I used Lakeland non-stick liners but greaseproof paper/ baking parchment would be fine).
  • Beat the margarine until soft then add the sugar and cream until light and fluffy.Stir in rest of the ingredients and mix well.
  • Place spoonfuls of the cookie dough onto the baking trays – I used an ice-cream scoop as I’m hopeless at getting things the same size. 
  • Flatten the cookies slightly with your fingers, and make sure the cookies are not too close together otherwise you’ll end up with one giant cookie.
  • Bake for 8 -10 minutes then leave them on the tray for one minute to firm up slightly before lifting them onto a wire rack. I found they were too soft to move otherwise.
  • Leave on wire rack to cool. Resist if you dare!!!!!

Gertie xx

Sunday, 27 January 2013

Quilted bag


Over the years my fabric stash has just got bigger and bigger. It's mainly off-cuts from evening dresses, sun tops and skirts and Mr Gertie’s old work shirts. 

I mentioned to my Mam that I might have a clear out of my fabric stash as it was taking too much space in my work room. She suggested instead of throwing some of it away, why I didn’t make a quilted bag.

She goes to a Quilting Group and a few months previously one of her quilting friends had passed round a pattern for a large tote bag.

I don't know whether this was a ruse to get me into quilting, as my Mam, who's a beautiful quilter, has been trying for years to get me interested in it. 

I remember making some kind of ‘patchwork thing' when I was in primary school, but it was using the paper method (you use paper as a template for each piece, hand sew them all together then remove the paper. Extremely boring!!!!), and ever since then I've associated patchwork and quilting as being monotonous….

My Mam promised me the bag was simple to make and a great introduction to quilting. See – told you!!!!! 

I had to admit that the bag did look nice, and being a woman, you can never have enough bags, so said I'd give it a go.

My Mam was over the moon and couldn't wait to have a good rummage through my fabric stash for colours she thought would make a great bag. Hang on a minute – who's bag is it!!!!

The bag was made up of 46 five inch squares cut from Mr Gertie’s old work shirts and some off cuts from a couple of summer skirts. All I had to do was cut them out then stitch them together.  Sounds simple. It would have been had I read the pattern correctly….

I had assumed that the finished squares were five inches so had cut the squares to five inches then added the required seam allowance. However the five inch squares had already included the seam allowance so the correct finished size was 4 ½ inches.  Oops!!

So, instead of having a gargantuan bag made up of 46 squares, I scaled it down a little by not using all the squares. 

Once I stitched the squares together I quilted the bag simply by using the sewing machine footer as a guide and outlined the edges of the squares.

The flap was made by stitching two squares together with a little interfacing sandwiched in-between them.  For decoration a button salvaged from an old knitted cardigan was attached to the front of the flap. A press-stud was stitched to the underside of the flap and to the front of the bag. 

For the lining I simply stitched three long pieces of fabric together.

To make the bottom of the bag sturdier stiff cardboard was cut to the size of the base then covered in lining fabric. 

I later added a pocket inside the bag by hand stitching one of the spare squares to the lining. 

Gertie xx

Saturday, 26 January 2013

January's (second) bake of the month


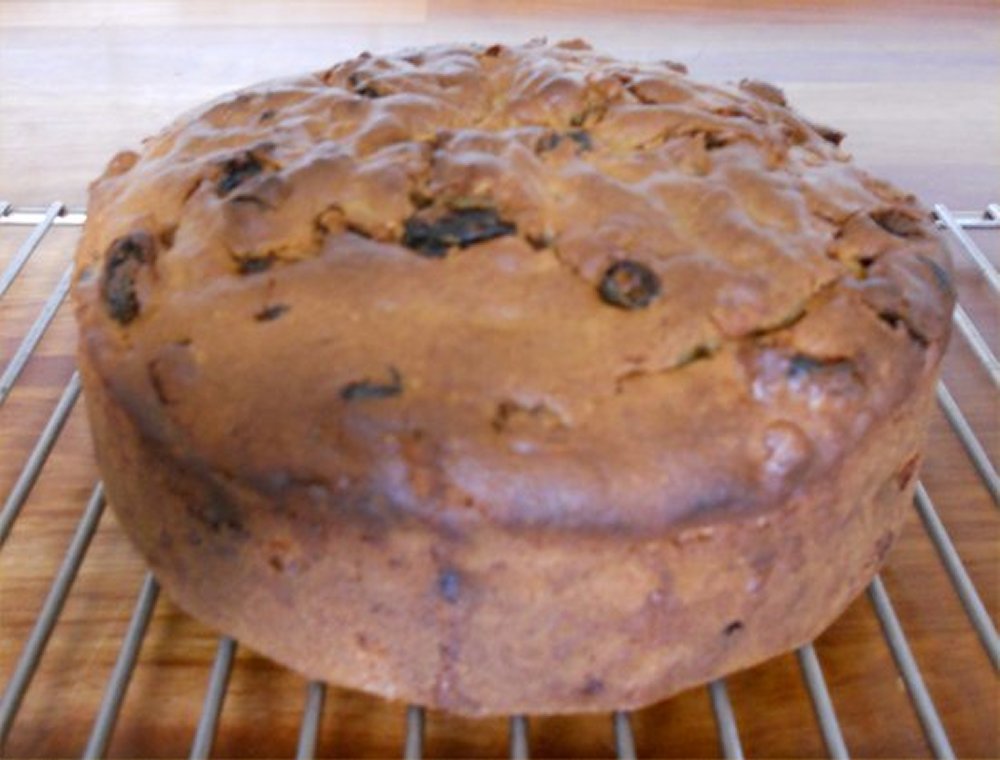
When I was growing up this cake was always a big favourite with everyone at home. My mam would usually make it on a Saturday afternoon and we'd sit at the kitchen table drumming our fingers and staring at the oven waiting for it to cook.

The anticipation was even worse when it came out of the oven as it's fabulous warm so we’d sit at the kitchen table waiting impatiently for it to be cool enough to eat.

Unlike normal fruit or spice cakes, the butter and sugar aren't creamed together. Instead the flour and butter are rubbed together, just like in making pastry. This is what gives the cake it’s beautiful texture. 

 As the cake is quite crumbly, if you try and cut small slices, especially when it’s warm, it disintegrates. So, the only solution is to have large slices !!!!

Country spice cake

 Ingredients:
  • 8oz/225g self-raising flour
  • ½ teaspoon of ground mix spice
  • 3oz/75g margarine or butter
  • 4oz/100g soft brown sugar
  • 4oz/100g raisins
  • 4oz/100g sultanas
  • 2oz/50g mixed peel, chopped
  • 2oz/50g glace cherries, chopped
  • ¼ pint/150ml milk
  • 1 large egg, beaten into the milk
 
Method:
  • Pre-heat oven to 180º c/Gas Mk 4. Fan oven 160ºc.
  • Line a 7 inch/18cm round cake tin with baking parchment. You could use one of the special cake liners (Lakeland sell them and they're brilliant), however I think a fruit cake tin deserves to be lined the traditional way. 
  • Sift the flour and mix spice together into a large bowl then rub in the margarine or butter until it resembles fine breadcrumbs – just like when making pastry.
  • Next add the sugar, raisins, sultanas, mixed peel and cherries to the bowl and give it a quick stir to mix everything together. 
  • Finally mix in the beaten egg and milk. The mixture should drop from a wooden spoon when shaken. If it doesn’t then add a little more milk. 
  • Pour into the tin then make a slight well in the centre – this stops the middle rising too much.
  • Bake in the oven for 1 hour, or until a skewer comes out clean. I prefer to use a piece of spaghetti for this but you could use a clean knitting needle or cocktail stick. Leave it in the tin for five minutes before turning out onto a wire rack to cool. Resist as long as you can before cutting into it !!!

Gertie xx

Monday, 21 January 2013

Glasses case


Glasses case and lens cloth cover


When I got my reading glasses they came in the horrible case you get given free from the Opticians. 

There was an excuse if ever I needed one to get sewing. I looked through my craft books to see if they had any glasses case I could make or adapt. There were a couple but I wasn’t keen on them – too old fashioned….

Out came my trusty left handed tape measure (yes there is such a thing !!!!) and I did some measuring. Then using graph paper I plotted out the pattern. 

The needlework stitches I’d decided to use were ‘Rhodes stitch’, worked over 10 threads, and ‘cross stitch’ worked over three threads. The wool wasn’t anything fancy, just ordinary double knitting. 

After cutting out a piece of 12 hole tapestry canvas and allowing a generous seam allowance, the edges were then taped with masking tape to stop them from fraying. 

Once the needlework had been finished I stitched the case together. Using some cream fabric I made the lining then hand stitched it to the cover. Finally I stitched a press-stud to the top of the case to stop the glasses from falling out.

I made the lens cloth cover exactly the same way as the glasses case.

Gertie xx