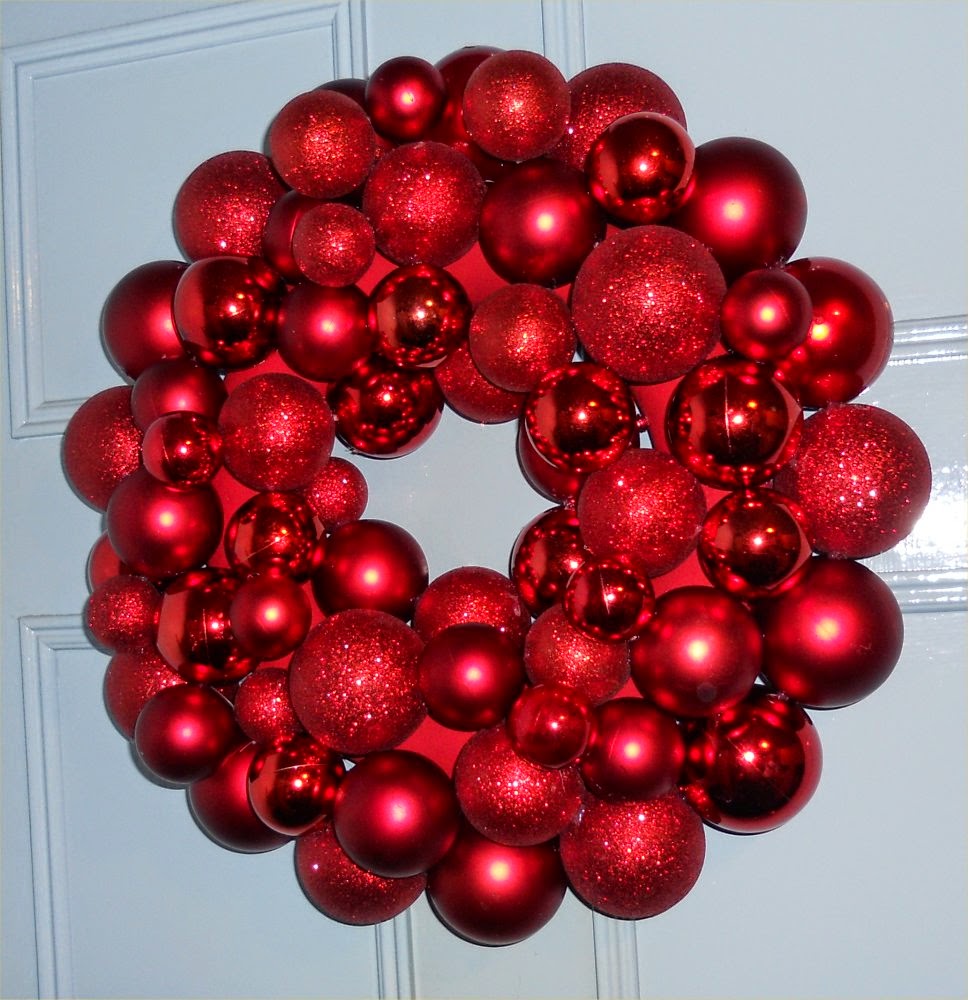
I was having a think about what Christmas decorations I could make this year. I didn’t fancy making anything with fabric so had a look around on pinterest for ideas. There were some lovely things to make but one really caught my eye, a bauble wreath.
There appeared to be two different methods of constructing a bauble wreath – using a wire coat hanger or a polystyrene wreath. It was pretty much a toss of a coin as to which one I’d go with but in the end the polystyrene method won.
Here’s what I did.
First of all you’re going to need a polystyrene ring. They come in various sizes and rounded or half rounded. Mine was 12in/30cm and half rounded but use whatever you wish. I bought mine from Amazon but you’ll probably find them in places like Dunelm Mill, Hobbycraft or eBay.
You can skip this bit if you like but I painted my ring as I was concerned about the white showing through. I used a tester pot of matt emulsion paint from B&Q (other DIY stores are available.....) but children’s poster paint would work just as well.
Next you’re going to need a hot glue gun and some baubles. I have to confess I did have to buy a glue gun as we didn’t have one. However they’re not expensive. I got mine from eBay for £5.45 – free p&p and 50 sticks of glue which I thought was really good value. Having now seen how good it is, it will certainly be used a lot around the Gertie household.
I did a bit of research on google and found that the various ‘pound’ shops and supermarkets were offering good deals on baubles. Mine came from Tesco (£5 for a box of 40 mixed sizes) but that was simply because we happened to be shopping there.
The tricky bit – how many baubles to use? Of the two boxes I bought I had 16 of the really small ones left. However if you’re using just small baubles then you’ll probably need about 100. If you have any left just put them on the tree.....
With your fingers or a pair of pliers pull off the metal ends from the baubles. You can either remove them all at once or just as you need them. They’re really easy to put back on though.
Now for the fun!!!! Start with the inner and outer edges of the ring first. If you have mixed sizes of baubles keep the really big ones for the outer edge. Have a practice fit first in the centre to see how it looks, especially if you have baubles of mixed sizes as you may need a smaller one to complete the circle. When you’re happy then it’s time to start gluing.
Because the glue gun can dribble a little you may want to put some newspaper down to protect your table or work surface. Put a bit of glue on the tip of the bauble where the metal hook used to be then attach it to the ring, holding it in place for a couple of seconds. Do the same with the next one then put a dab of glue in-between the baubles to help secure them. Continue until both the inner and outer edges are done.
Next fill the space between the outer and inner edges with baubles. If you’re using mixed sized baubles the small ones are ideal for filling in any gaps.
All you need to do now is attach a hook to the back of the wreath then put on a door and admire your handiwork....
Remember at the beginning of the post I said it was a toss-up as to which method I’d use to make the wreath. Here’s the other way.
Take a wire coat hanger and shape it into a circle. Untwist the top of the hanger so it comes apart. Thread the baubles onto the wire then re-twist the top of the hanger to secure them. Finally snip off the hook with some wire cutters or leave it as it is, then cover with some ribbon.
Have a great week.
Gertie xx
PS why not pop over to Handmade Monday to see what other fellow craft bloggers have been up to.


It looks stunning Gertie, I have also recently invested in a glue gun and it's awesome.
ReplyDeleteWow! A great explanation and a great result. Very sensible to paint the ring red first :)
ReplyDeleteThat looks so effective. I'm a bit scared of glue guns, having got in a pickle with one at work.
ReplyDeleteLooks lovely and festive! Thanks for sharing how you made it.... think I'll keep an eye out in the charity shops for baubles ;) x
ReplyDeleteWow!! How amazing does that look! I'd never have thought of using baubles on a wreath. Thanks for the great tutorial too x
ReplyDeleteI really would love to make a wreath one year, using crochet of course, maybe one year i'll have time xx
It looks great. Have you tried method 2 at all? I think that might be fun to have a go at too. Thanks for 2 great ideas!
ReplyDeleteThank you for posting such a great tutorial. I think I have a foam wreath so all I need to buy are the bobbles. It turned out beautiful!
ReplyDelete